Lighting is a huge slice of what viewers read as “quality” on stream—not just resolution or camera price. Your webcam can only render what the light gives it: get the light right, and a simple room reads as polished; get it wrong, and even good gear can look flat, grainy, or unflattering.
This half of the lesson covers the tools streamers use most often, what makes lighting feel “professional,” the color temperature that tends to flatter skin on camera, and how to use window light without losing you in silhouette.
Why lighting competes with your camera for attention
Strong lighting is one of the first things long-time models upgrade, because viewers pick up on it fast: even, intentional illumination reads as high-end. Weak or uneven light forces the camera to compensate—often adding noise, dulling color, or exaggerating shadows you did not mean to show.
Used well, light shapes how people see your face and figure and supports the mood you want—soft, dramatic, bright and commercial, or anything in between—while keeping you easy to read on a phone screen.

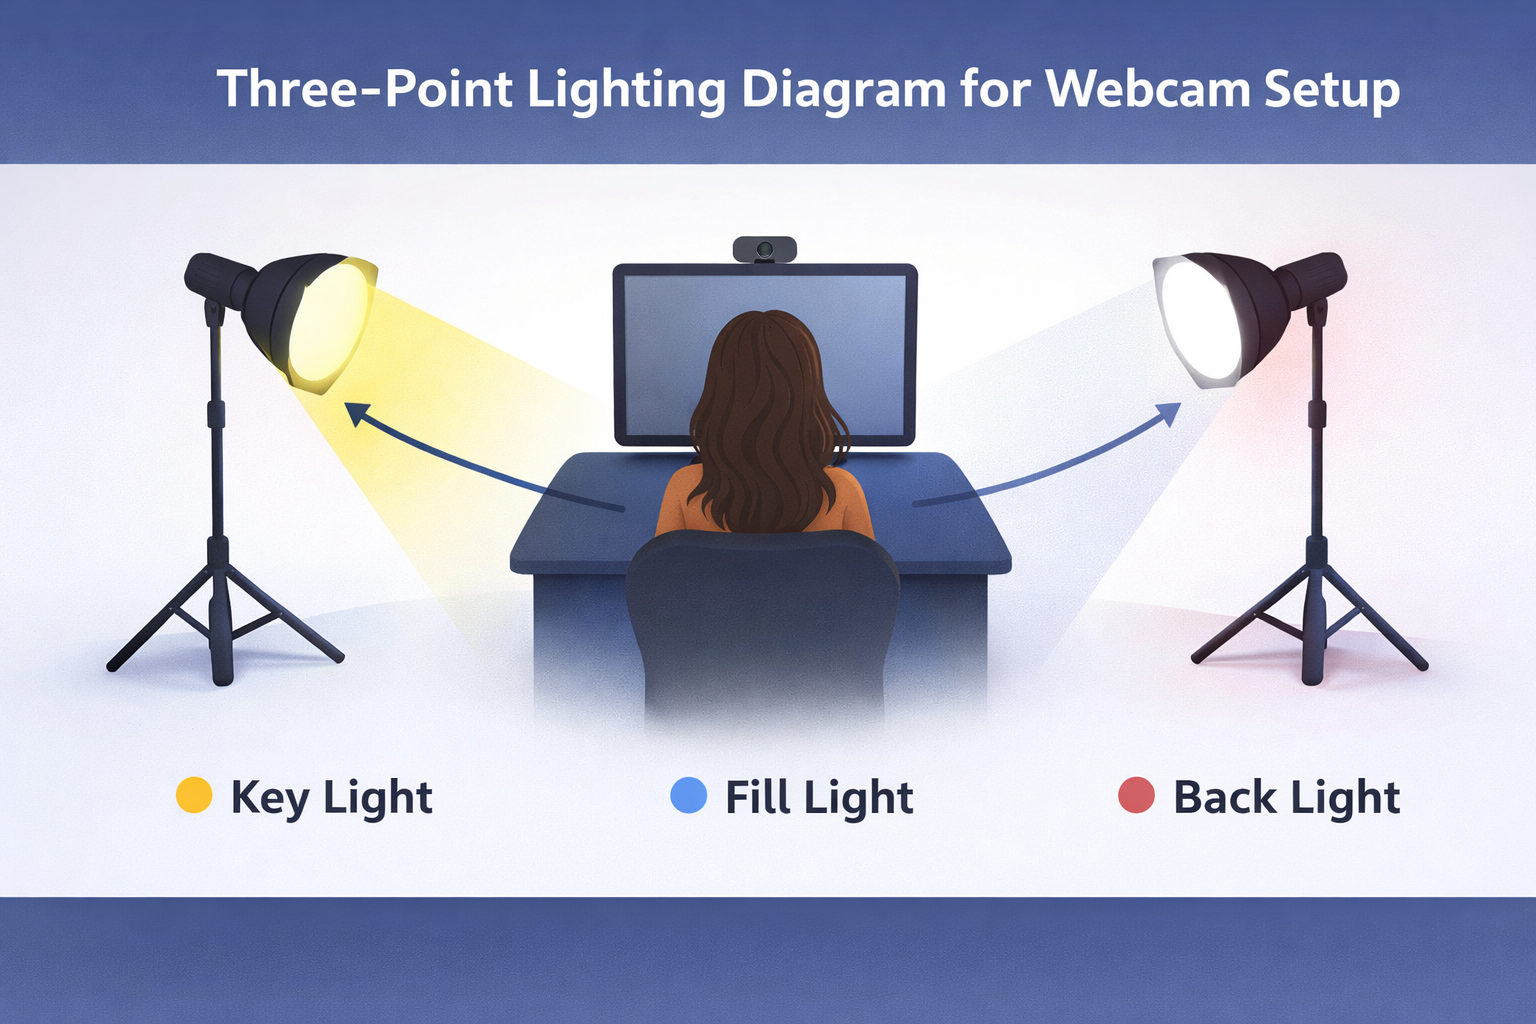
Three jobs your lights should do
Think in terms of outcomes: flatter your features (face and body read clearly and attractively), set the atmosphere (match the tone of your show), and raise overall video quality so you look sharp and in control. When those line up, people tend to stay longer and trust what they are watching.
Ring lights, LED panels, and softboxes
Most cam setups lean on some mix of these:
Large ring lights—often around 18″ and up—give broad, even front light and are simple to center on your camera. LED panels (square or rectangular) let you wash yourself or a wall with adjustable brightness. Softboxes use diffusion to mimic soft studio portrait light.
Pick based on room size, mounting options, and the look you want. The “right” tool is the one you can position consistently night after night.
What you gain when you step up from household bulbs
Not all light sources behave the same. Inexpensive bulbs and tiny USB rings are fine starting points, but they often lock you into one color, one brightness, or awkward placement. Gear built for photo or video usually gives you separate control of intensity, color temperature, and direction—so you can save a look and repeat it every time you go live.
For light hitting your face, a neutral daylight balance around 5,000K–5,600K is the sweet spot for most webcams: it reads clean and white on camera and avoids the heavy yellow cast that warm-only front lights can add.
Keep the key light on your face neutral
Warm lamps elsewhere can cozy up the room, but a warm key straight in front of you often makes skin look sallow or uneven on stream. Rule of thumb: the main source that defines your face stays in that daylight range; if you use warm accents, keep them off your primary facial lighting or balance them deliberately.
Budget setups and sensible upgrades
If you are on household hardware, squeeze the most from distance, angle, and bounce (light reflecting off a pale wall before it hits you). When you can spend once, prioritize adjustable brightness and temperature over buying more identical cheap lamps—two controllable lights usually beat five random ones.
Windows and natural light
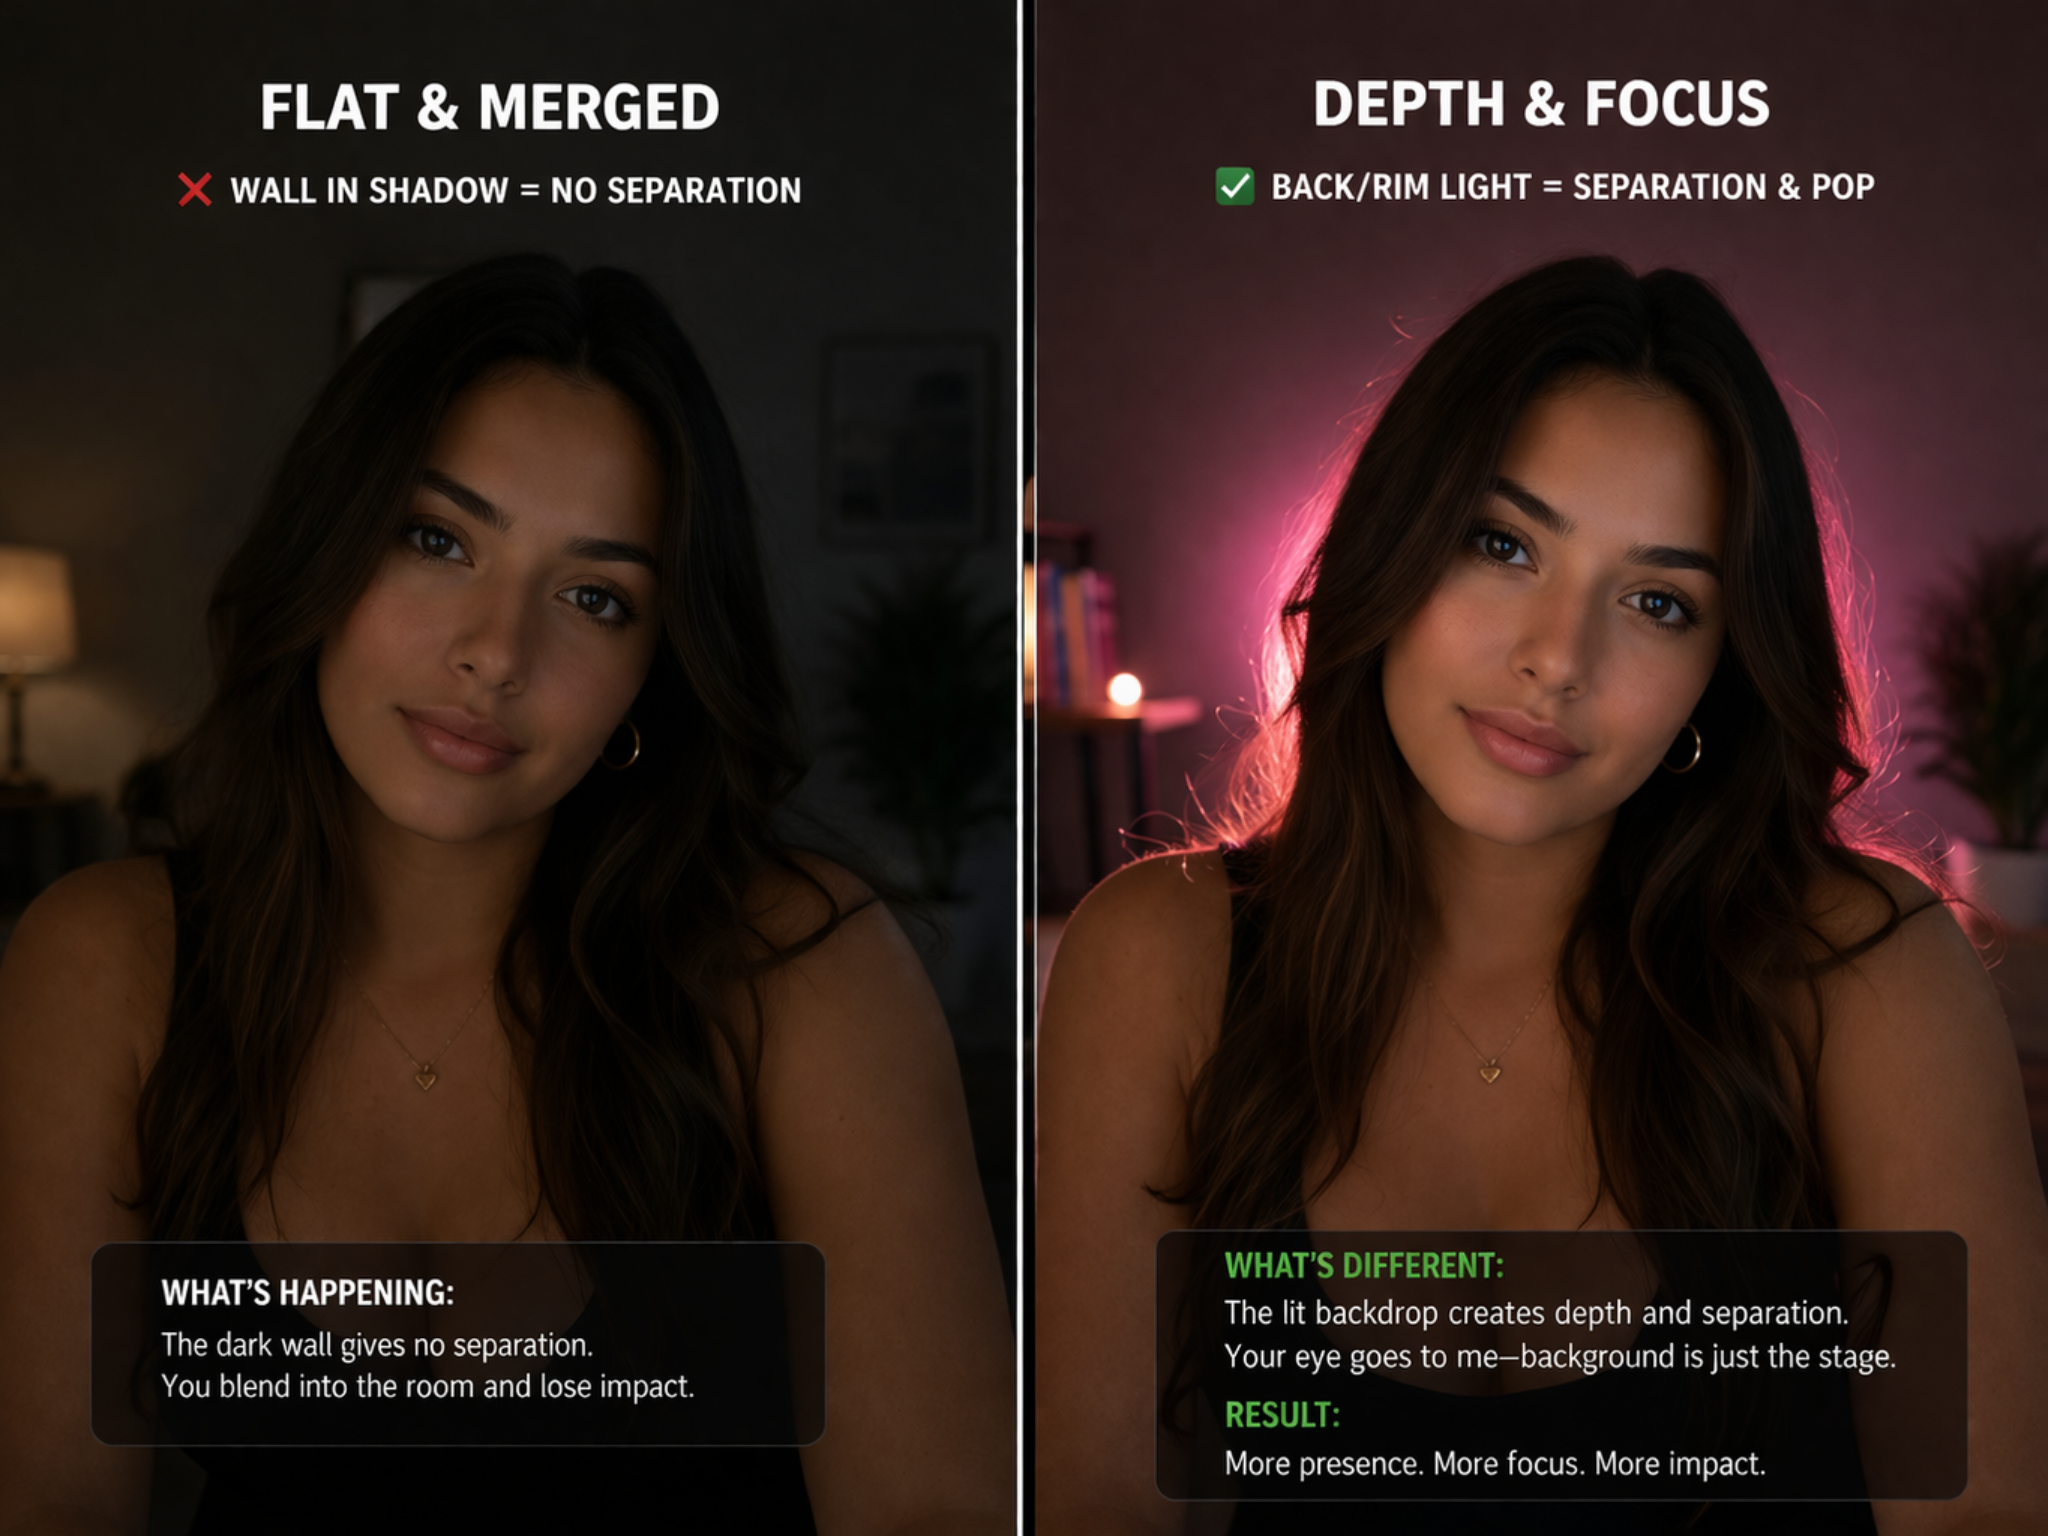
Window light can look gorgeous, but backlighting—bright glass behind you—often silhouettes you or blows out the background unless your camera and foreground exposure are very carefully balanced. Easiest pattern for most rooms: let the window hit you from the side, and fill your face with a controllable artificial key so you stay the brightest subject.
Advanced setups can mix controlled backlight with a strong key; either way, the viewer’s eye should land on you first. Place that artificial key slightly above eye level so it opens up the eyes and models the face without the harsh “interrogation room” look of a bare ceiling downlight.